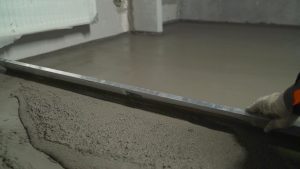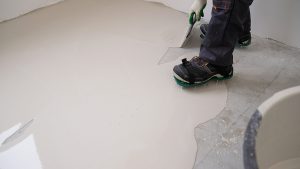
Humps and ridges form for several reasons, but usually result from the material not flowing together. Common causes include adding the wrong amount of water, slow batch transition, improper primer or surface preparation, short working time, temperature, and improper spreading techniques.
Self-leveling underlayment is anything but effortless. Despite the name, it does not simply spread into a smooth surface. The material needs a clean, prepared substrate, organized mixing and a clear sequence of operations, and the right tools and personnel to ensure a continuous pour.
Does Self Leveling Underlayment Even “Level” Itself?
No. Self-leveling underlayment must be placed, brought to finish depth, spread, adjoining pours blended, and all entrapped air popped before it begins to set.
Keep in mind that flow times and heal times vary by product. ARDEX self-leveling underlayment products list approximately 10 minutes of flow time in their technical data. However, ARDEX K 10 lists up to 25 minutes of heal time when properly installed with a spiked roller. These subtle differences alter crew size, mixing sequence, and even the tools required for each project.
In our opinion, each self-leveling product should be treated like a team of installers working together in a calibrated installation system. Don’t view it as a bag of material that magically levels the floor.
Can Using the Wrong Amount of Water Create Humps in Self Leveling Underlayment
Yes. Too much water or too little water changes how the underlayment flows, sets and performs. Adding too little water creates a mix that is difficult to spread and blend. Adding too much water weakens the material and can cause unnecessary separation and inconsistent curing rates.
Each bag needs to receive the exact amount of clean water listed on that product’s most current technical data sheet. Water should be measured, not guessed at by appearance.
Many products call for a range of water temperatures while others list an exact number. Published water-to-powder ratios also vary by product. ARDEX V 1200 calls for 5 quarts of water per 50-pound bag. ARDEX V 1300 allows for a range of 4¾ quarts per bag to 5¼ quarts per bag. These are just two examples of why a crew should never reuse the same ratio of water when installing multiple self-leveling products.
Thinking your mix is too thick? Confirm the water temperature, mixing equipment, total mixing time, and the product’s storage condition before adding extra water.
Why Do Ridges Form Between Batches?
The most common cause of ridges between two separate batches of material is poor batch transition. The next pour may not blend into the beginning edge of the previous pour before it starts to set. What you are left with is a raised seam that is often visible after the material cures.
This is commonly called a cold joint or pour line. More often than not, cold joints occur when the mixing area is too far from the install area, not enough crew members are used, or materials are not staged before the pour begins. Additionally, pouring each batch individually without continuously preparing the next will usually result in cold joints.
Part of the problem also stems from not allowing enough time to blend the two pours together. A product with a 10-minute flow time does not give you 10 minutes to walk away and think about what batch number you just mixed. You must mix, carry, pour, gauge, and blend each batch within that short window.
Depending on the pour size, you may need multiple mixing barrels, a mixing cart, or even pumping equipment. Companies like ARDEX offer rolling barrel systems to transport controlled three-bag batches as part of their effort to increase jobsite efficiency during self-leveling installations.
Does Primer Affect How Self-Leveling Underlayment Flows?
Yes, primer selection and application can affect how self-leveling underlayment flows, bonds to the substrate, and how porous concrete absorbs the water from the material. Poor primer coverage can contribute to ridges, pinholes, bubbles, inconsistent absorption, and poor bonding between the floor and the SLU.
MAPEI says primers increase adhesion and bond strength. They also reduce surface imperfections like pinholes and air traps. Different substrates require different primers. Self-leveling underlayment requires primers that are appropriate for porous concrete, nonporous substrates, gypsum, wood, existing tile, and even adhesive residue.
Before applying primer to the slab, the floor must be prepared. Dust, curing compounds, paint, adhesives, oil, weak concrete and other contaminants can compromise both the primer and the SLU.
Custom Concrete Prep & Polish covers these basics in their article about Using Self Leveling Underlayment Over Existing Concrete. Make sure the existing slab is sound, clean, and prepared before applying another layer of cementitious material.
Should High Spots Be Grounded Down?
Yes. All major high spots should be ground down before pouring self-leveling underlayment. Pouring material over an existing hump will often require raising more of the floor than needed just to match that spot.
Remember, adding more material increases cost and finished floor elevation. A pour that is too thick may cause issues with doors, stair landings, cabinets, drains, equipment bases, thresholds, and adjacent flooring.
Custom Concrete Prep & Polish has a great article on when to Grind High Spots Instead of Self-Leveling Underlayment. You do not always need to pour self-leveling material over the entire floor. If most of the floor falls within tolerance, it may be more cost-effective to grind down the high area instead of leveling everything.
Self-leveling underlayment is a great product but should be used strategically. Self-levelers should be used to correct existing floors, not bond to and hide defects that should have been removed during preparation.
Can Room Temperatures Cause Self Leveling Underlayment?
Of course! Like most concrete products, self-leveling underlayment reacts to extreme temperatures by changing its working time. Hotter temperatures decrease working time, while colder temperatures increase set time.
USG recommends keeping its self-leveling product, concrete substrate, and room between 50° and 95°F for at least 72 hours after installation. Refer to the technical data for your chosen product before deciding what temperature range to maintain.
Sunlight streaming through windows, heated slabs, open doors with fans blowing directly on the floor, and hot mixing water can also cause problems with flowing self-leveling material. One side of the room could be kicking your crew out because it began setting sooner than the rest of the floor.
Colorado winters and summers can be brutal. Make sure the material you store in a hot truck one day will react the same as material stored in a cold warehouse or building interior.
Depending on the building’s condition, it may need to be enclosed and climate-controlled before work begins. Fans and HVAC vents may also need to be adjusted so one part of the floor doesn’t dry faster than another.
What Tools Can Help You Avoid Ridges?
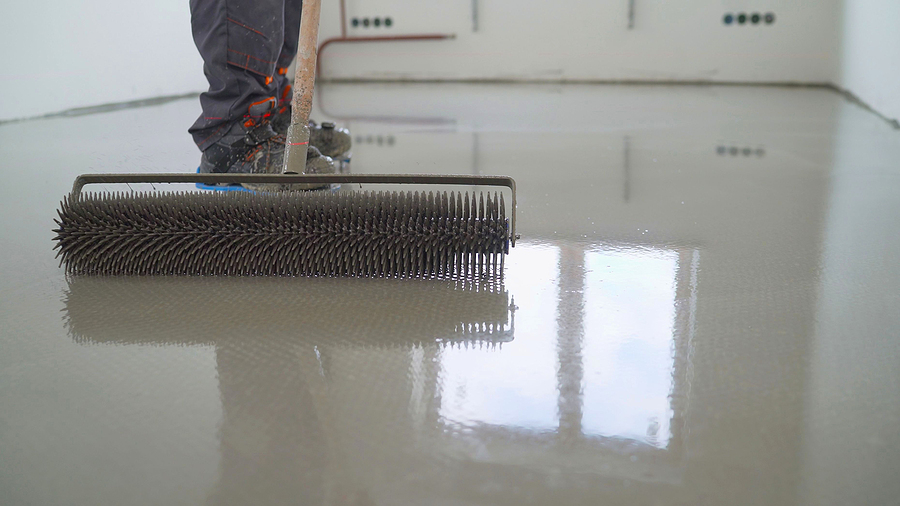
Installers use tools to help control depth, blend adjoining pours, and pop air bubbles before the material sets. Gauge rakes or spreaders push material around the floor, while spiked rollers help adjoining pours heal together, if the product allows.
Installers wear spiked shoes to walk through wet material without leaving foot impressions. Gauge rakes, leveling pins, laser measurements can help you identify where the floor needs to be after material is poured.
Every slab will differ, but your preparation and pouring process should normally include:
- Measured amount of water for each batch
- Correct size mixing drill, paddle, and barrel
- Proper primer for both substrate and self-leveling product
- Gauge rake or spreader set to appropriate depth
- Spiked roller and shoes (if allowed by manufacturer)
- Elevation markers or leveling pins
- Enough crew to mix and pour continuously
- Dams around doors, drains, penetrations, and open areas of the floor
Custom Concrete Prep & Polish offers more DIY tips in their article About Self-Leveling Concrete Floors. Take time to scan for cracks, fill cracks, mark low areas, locate drainage, and understand how much material you need before mixing that first bag.
Should Self Leveling Material Be Poured Over the Entire Slab?
No. Many floors require a full pour while others only need spot treatment.
Full pours are required when there are numerous low areas, the floor transitions up and down often, or when the finished flooring needs an ultra-smooth substrate. Spot grinding and patching may work better when only a few low areas exist and do not affect flooring tolerances.
The article Should You Self-Leveling Underlayment Be Poured Over the Whole Floor? Or Only in Low Spots? explores the topic further. Just because you have a self-leveling product on site does not mean your floor needs it. Evaluate the slab by taking measurements. Let those floor measurements and the flooring you want to install dictate what needs to happen to the floor.
Can I Fix Humps and Ridges After Installation?
Yes. Once the self-leveling material has cured, high spots can be ground down and minor ridges can be patched. However, the contractor must determine if the ridge is simply at the surface or if the material never bonded to the substrate.
If it is solid between batches, ground it into a plane with the rest of the floor. If there is a depression next to it, it will likely need to be patched with a compatible patching material or even a second leveling application.
Floating, cracking, or material that comes off when you grind at the ridge indicates there is a bigger problem. Grinding off the top does not restore the bond. If the underlayment isn’t bonded to the floor, you’ll need to remove and replace unstable areas.
This also depends on what kind of flooring you install afterward. LVP, sheet vinyl, tile, carpet, and wood all have different requirements for flatness and smoothness. Consider the finished flooring before patching self-leveling underlayment.
How Do You Prevent Humps and Ridges in Self Leveling Underlayment?
Measure your floor and correct major problems before installing self-leveling underlayment. Clean, prepare, prime the floor, stage materials, and pour the material in a continuous sequence. The product you select should dictate water, thickness, temperature, tools, and even working time.
At Custom Concrete Prep & Polish, we provide professional concrete floor leveling services to customers around the Denver metro area and Colorado’s Mountain West. We take the time to understand the slab, discuss all available options, and design a detailed prep plan that works for your finished flooring.
Contact Custom Concrete Prep & Polish today to schedule your consultation. We’ll come out, review the floor conditions, and decide whether grinding, patching, or full SLU installation is needed.