There’s few things more annoying than dealing with leveling issues in the middle of a flooring project. You’ve finished installing a thin leveling layer only to notice it’s chipping, cracking, or separating from the concrete slab.
The leveling material may have been installed yesterday or ten years ago. Either way…chipping almost always means something went wrong with the bonding process.
Property owners often believe the solution is as simple as patching the damaged spot and calling it a day. Unfortunately, that visible chip is often just the symptom of a larger problem. Unless you identify and resolve the root cause of the issue, your new repairs will fail just as quickly as what’s already there.
So what should you do when thin leveling layers chip off the concrete slab? Let’s dive in.
Find The Root Cause of the Issue
Start by understanding why the material is failing.
Assess the Damage
The first step is understanding how much damage is present.
One small chip does not necessarily mean your entire leveling layer is damaged. Sometimes very small sections of the flooring will chip away due to impact damage or stress while the rest remains bonded.
On the other hand, if multiple areas are popping up or the leveling layer sounds hollow when tapped. The damage is likely more widespread.
Inspecting the floor carefully will help you determine whether your repair can be localized or requires addressing larger sections of the floor.
Determining the extent of the damage can help you figure out why it failed in the first place.
Understanding Why Leveling Layers Fail
Thin leveling layers are meant to bond incredibly well to clean concrete surfaces. When that bond is broken or fails to develop, the thin layer can start to crack off.
Here are several reasons that commonly cause this to happen:
- Poor Surface Prep
- Moisture in the slab
- Improper primer
- Improper mixing
- Substrate movement
- Weak concrete
- Applied too thin or too thick
Knowing exactly why your leveling layer is failing will guide you towards the proper solution.
Avoid Patching Loose Areas
Homeowners make the mistake of trying to patch directly over top of areas that are already loose. But if your leveling layer is already losing adhesion to the concrete…laying new material on top of it won’t fix the problem.
The new patch will simply rely on that same weak bond to stick to the floor. Always remove any loose material before attempting a repair.
You may need to grind, scrape, or mechanically remove damaged sections until you reach stable material.
Don’t Patch Over Failed Areas
Use a tapping method to check for hollow-sounding areas.
It’s common for areas beyond the visible damage to have also separated from the slab. If these areas are not removed during the repair, they will likely chip off in the future as well.
Once you find the loose section, tap around the perimeter with your hand or a screwdriver. Hollow-sounding areas are usually indicative of delamination.
Make sure you remove all damaged material before proceeding with the repair.
Inspect the Concrete Slab
Sometimes the problem is not with the leveling material and actually lies within the concrete slab.
If there is damage, moisture, contaminants, or weak concrete underneath the repair, your chances of success are greatly reduced.
Once you’ve cleared all the loose material, inspect the concrete and ask yourself these questions:
- Does the concrete feel solid?
- Is there moisture on the slab?
- Are there contaminants in the concrete?
- Does the concrete feel soft?
- Are there cracks that will contribute to movement?
The condition of your concrete will determine what you need to do before applying new leveling material.
Clean & Prepare the Surface
Once you’ve identified the cause of your issue and removed all damaged material, you’ll need to prepare the surface.
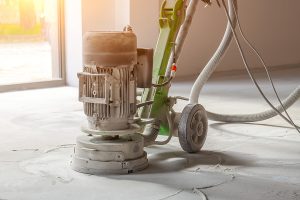
Proper floor prep is one of the most important aspects of repairing chipped leveling layers. Concrete slabs should be cleaned and mechanically prepared to provide a strong bonding surface for repairs.
Many people choose to grind the surface because it effectively removes any contaminants while providing enough texture for good adhesion.
Always prepare the surface before applying new repair materials.
Select an Appropriate Repair Material
Not all patching materials are created equal.
When repairing thin areas, ensure the material you’re using is suitable for feather-edge applications.
Some patching materials don’t flex like a leveling compound. They can also create more edge failures and poor bonding if they’re not designed to be installed thin.
Always select a repair material that is appropriate for the conditions and the repair.
Address Moisture Issues
We see it all the time… basements and concrete slabs with moisture problems.
If there is moisture traveling through your slab, you’ll have a hard time getting any material to stay bonded to the floor. Repairing the floor without addressing the moisture problem will result in more failed patches.
Be on the lookout for:
- Efflorescence
- Damp areas on the floor
- Discoloration
- Repeat delamination
- Other coating failures
Have a suspect area on your floor? Have it tested before attempting to repair it.
Flooring Requirements
Have you considered what you’ll be installing over top of the repairs? Flooring material has a huge impact on how you need to prepare the floor.
Luxury Vinyl Plank, tile, hardwood, carpet, and even polished concrete all have different flatness and stability requirements. What may look like a good enough repair to the naked eye might not hold up to the flooring you have planned to install.
We often run entire floors of carpet to ensure there are no low spots after repairs. Doing a final walkover helps us avoid future flooring issues.
Look Beyond the Chip
More times than not, when a thin leveling layer chips off the concrete slab, there’s more to the problem than what you see.
That visible chip could be the result of a bonding issue, substrate problem, moisture intrusion, or installation error lurking beneath the surface. Patching that spot may offer a temporary solution but won’t provide a long-term fix.
By knowing what caused the damage, properly preparing the surface, and using the correct repair material, your repairs can last just as long as the original installation.
Trust the Pros at Custom Concrete Prep & Polish
Here at Custom Concrete Prep & Polish, we take pride in not only installing concrete floor prep but also repairing issues. Chipped leveling compound, surface delamination, floor not flat issues, or substrate concerns. We can help determine why your flooring is failing and offer solutions to keep it from happening again.
Does your concrete floor have areas where the leveling layer is chipping away? Contact Custom Concrete Prep & Polish. We’ll come out to evaluate your floor, identify the cause of your problem, and offer repair suggestions to prevent future issues.